Static Continuous parameters are used when the user needs to pick something from a list of items, but the listing is based on a numerical range that has only been described by that range. In this way, continuous parameters contain a 'soft' listing of items. As such they can be used for driving only numeric selections throughout the application. They can also be global in scope, or attached to a specific data model.
Creating a Continuous Parameter
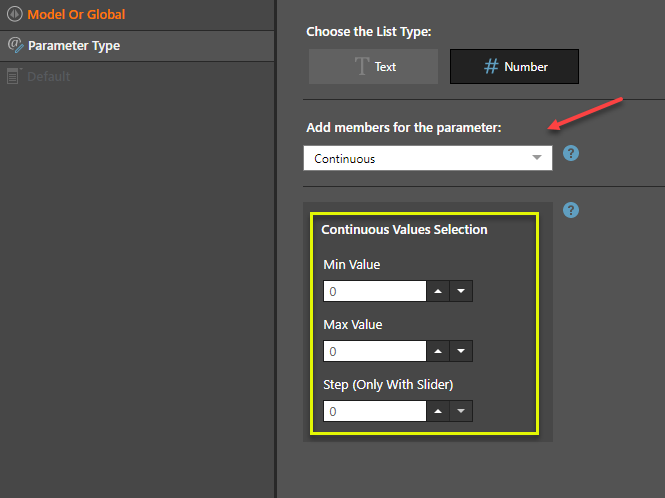
After selecting the parameter's scope (model or global), you need to choose Number, and then choose continuous (red arrow).

In the section below (yellow box), provide the definition for the continuous range.
- Min Value: This is the lowest value that the parameter will accept.
- Max Value:This is the highest value that the parameter will accept.
- Step Value: When using the slider visualization control, this is the increments that the slider will produce as the user moves the thumb button. In effect, it discretizes the range.
If the user uses a text box as the input control, the step value is ignored - allowing the user to input any value between the min and max values.
Continuous Parameter Example
This is a good way to create year-to-year and month-to-month date ranges. In this example, a range of Month elements is created. The end month is selected from the Month slicer, and the start month is selected from the Number of Months slider.
STEP 1
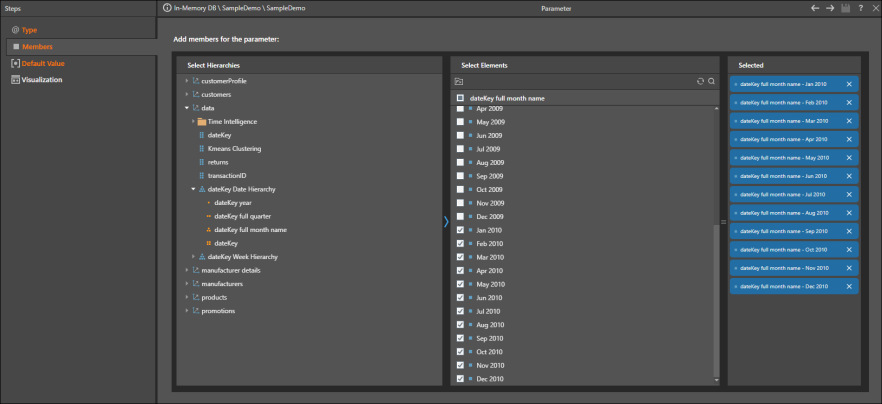
Create a dynamic list parameter containing the required months.

STEP 2
Create a numeric continuous parameter containing the required number of months. In this example, the minimum is set to 1 and the maximum is set to 11, meaning that when a month is selected from the Month slicer, the maximum number of months that can be displayed in the query will be 12. You can select a slider or a text box visualization.

STEP 3
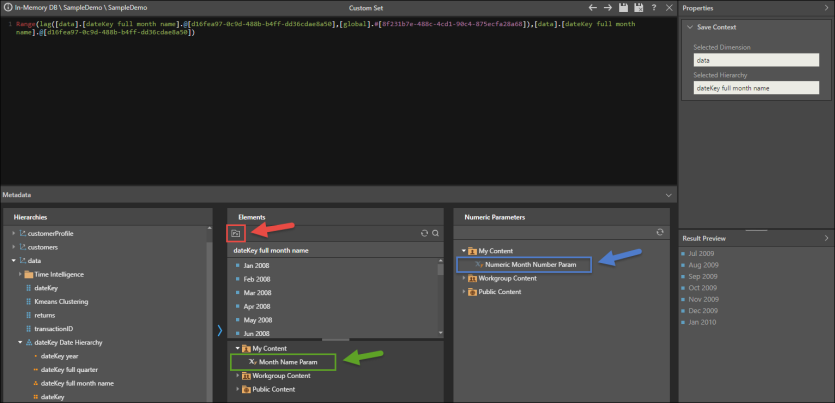
In List, create a Custom List with the following syntax:
Range(lag([data].[dateKey full month name].@[memberparameter],[global].#[numericparameter]),[data].[dateKey full month name].@[memberparameter])
Where memberparameter is the member (text) parameter created in step 1, and numericparameter is the numeric parameter created in step 2.
The range function is used between the member parameter [data].[dateKey full month name].@[memberparameter] and the lag of the same parameter, by the numeric variable parameter [global].#[numericparameter].
Note: To add the member parameter to the formula, open the relevant hierarchy and click the Fx button in the Elements panel. Find your member parameter in the content tree under the Elements panel. To add your numeric variable, find and select it from the Numeric Parameters panel.

STEP 4
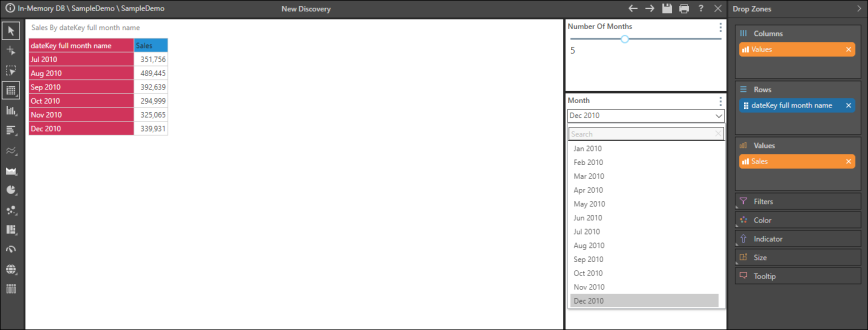
To use the custom set in Discover, add it to the query and move the blue chip from the Filter zone to the Rows zone.
Use the Month slicer to select the end date for the range of months, and use the Number of Months slider to select the lag (start month). The selected end month and lag value will be added to the query, along with the range, so if 5 is selected from the slider, a total of 6 months will be displayed.
